Blue freshwater pearl earrings are one of the most stunning pieces a jewelry maker can create. And fortunately, blue pearls are an endlessly versatile material. Depending on the pearl color, shape, and metal pairing you choose, they can feel effortlessly coastal, sleek and modern, vintage-inspired, or richly dramatic.
Soft aqua tones, for example, create a lighter, more relaxed aesthetic, while deep royal blue freshwater pearls bring depth, contrast, and a more elevated statement. Few materials transition this easily across different styles. And even better, the possibilities range from simple beginner-friendly styles to more detailed wire-wrapped designs that require experience and technique.
In this guide, we're sharing blue freshwater pearl earring styles that you can make at home, complete with recommended wire gauges, essential findings, and difficulty levels for each project. Wherever you're at in your creative journey, you can find a design style below that helps you create your perfect piece.
Before You Start: Tools, Pearls, Wire, and Findings
You don't need a lot of equipment to create blue freshwater pearl earrings. For the majority of designs, your core toolkit includes round-nose pliers, chain-nose pliers, and flush cutters for shaping wire, opening jump rings, and making clean cuts. Additionally, a bead reamer can be helpful if a pearl's drill hole is slightly too tight for your chosen wire gauge.
For stud earring projects, some may require a fine applicator, toothpick, and a reliable jewelry adhesive or two-part epoxy. And, of course, keeping a ruler nearby can make it much easier to ensure both earrings hang evenly, regardless of design type.
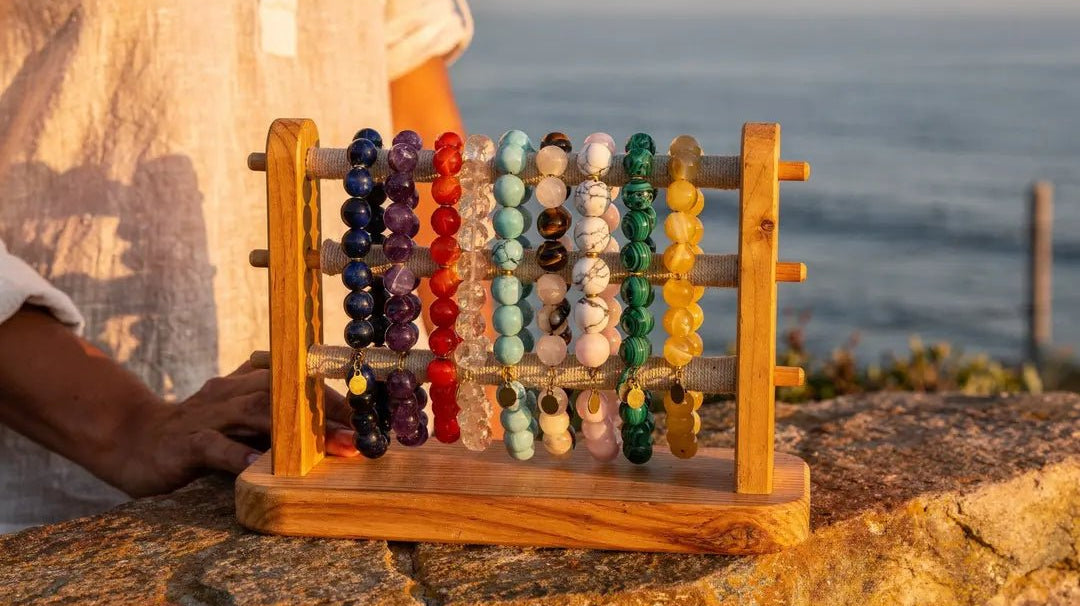
Ultimately, material matters just as much as tools. The Bead Traders' Freshwater Pearl Collection comes in a range of tones, from soft aqua and ocean-inspired hues to deeper peacock and navy finishes, as well as shapes that dramatically change the final design. Before starting, it's worth gathering your pearls, wire, ear wires, head pins, jump rings, and any accent findings you plan to use. By doing so, you can ensure the assembly process remains smooth and easy.
In addition to freshwater pearls, The Bead Traders also offer Metal Beads and Findings, as well as Chain by the Foot sections, making it easier to source coordinating materials in one place before you begin.
Best Pearl Sizes for Earrings
Choosing the right pearl size can dramatically affect both the look and the wearability of finished earrings. Smaller pearls, for example, create lighter, more delicate designs, whereas larger pearls naturally draw more attention and add visual weight.
As a general guideline, 4-6mm pearls work well for clusters, delicate dangles, and threaders—designs where you want movement without heaviness. The 7-9mm range tends to be ideal for classic pearl studs and simple drop earrings, offering enough presence to showcase the pearl without becoming uncomfortable for everyday wear.
Additionally, shape matters just as much as size. Baroque Pearls have an irregular, organic quality that works beautifully in modern or artistic designs. Conversely, Potato Pearls are rounder and more classic, suiting timeless earring styles. And finally, Ringed Baroque Pearls introduce additional texture and dimension for designs that feel a bit more visually dynamic.
For additional guidance, visit our post, "Freshwater Pearls Buying Guide: How to Pick the Perfect Pearl."
Wire Gauge Quick Guide
Choosing the right wire gauge makes jewelry assembly significantly easier. Additionally, it helps ensure your finished earrings hold their shape properly. As a general reference, a 20-gauge wire is often sturdy enough for handmade ear wires, geometric frames, and structural components that need to maintain form. A 22-gauge wire is typically the most versatile all-around option, making it a reliable choice for wrapped loops, custom head pins, and many standard earring builds.
For freshwater pearls with smaller drill holes, 34-gauge wire is often the better fit. Since pearl drill holes can vary, especially in natural freshwater varieties, a slightly finer fit gives you much more flexibility. In comparison, a 26-gauge wire is best reserved for delicate wire wrapping, cluster designs, and detail work where you want the wire to remain as visually unobtrusive as possible.
Additionally, wire hardness matters just as much. Half-hard wire offers better shape retention, making it ideal for handmade ear wires and structural designs that require stability. Dead-soft wire bends much more easily, making wrapping and shaping simple. This is especially true when working with thicker games or more intricate pearl cluster designs.
If you're curious about additional context, review: "Bead Hole Size Guide: Match Gemstone Beads to Cord Type."
Finding Recommendations
The right jewelry findings depend on the earring style you're making. Flat-pad or cup posts work best for pearl studs, while head pins and eye pins are essential for classic drops, stacked pearl designs, and simple dances. French hooks are the most common ear wire choice for hanging earrings, while leverbacks offer extra security thanks to their closure behind the ear.
For more detailed designs, you may also need hoops, chandelier components, jump rings, or chains sections to create structure and movement. Additionally, for comfort, gold-filled, sterling silver, or hypoallergenic findings are typically the best choice. This remains particularly important for pieces that are worn directly against the skin.
To keep sourcing consistent across your designs, visit our carefully curated selection of Goldtone Earring Wires, Gold-Tone Screwback Findings, and Silver-Tone Screwback Findings.
8 Blue Freshwater Pearl Earrings You Can Make at Home
Below, we will provide DIY blue freshwater pearl earring ideas that range from beginner-friendly to more technique-driven. If you're new to wire wrapping, begin with simpler projects and build your skill set from there.
Each design introduces slightly different materials, construction methods, and styling possibilities. Most importantly, as you browse through the list, each idea builds on the skills of the previous style. Following the techniques listed, you can create intention, curated, and perfectly unique earrings that suit your preferences.
1. Minimal Pearl Studs
Difficulty: Beginner
One of the easiest blue freshwater pearl earrings you can make at home, pearl studs require minimal tools and no wire wrapping. A single blue freshwater pearl attached to a flat-pad or cup-post finding creates a timeless everyday earring. For inspiration, 7-9mm pearls offer a more classic stud look, while 5-6mm pearls feel smaller and more intentionally understated.
Recommended Materials and Findings
Two matched blue freshwater pearls, flat-pad or cup-post earring findings, earring backs, two-part epoxy or jewelry adhesive, and a fine applicator or toothpick.
Basic Steps
Before beginning, match your pearls by size and tone. Also, make sure to test placement on the post without adhesive first. Once you've done this, apply a small amount of adhesive to the post pad, press the pearl firmly in place, and immediately wipe away any excess. Allow the adhesive to fully cure before wearing.
Design Tip: Slightly irregular baroque pearls create a more organic, handmade look, while rounder pearls feel more classic and polished. Both choices work, it's simply a matter of preference.
2. Classic Wire-Wrapped Pearl Drops
Difficulty: Beginner to Easy Intermediate
A classic pearl drop is one of the most versatile earring designs you can make. A single blue freshwater pearl suspended from a French hook or leverback creates an elegant look that works for both casual and dressier wear. This is also a great beginner wire-wrapping project for this interested in broadening their skills.
Recommended Materials and Findings
Two blue freshwater pearls, two 22- or 24-gauge head pins, two French hooks or leverbacks, optional spacer beads, chain-nose pliers, round-nose pliers, and flush cutters.
Basic Steps
Slide the pearl onto the head pin, adding a spacer bead if desired. Next, form a wrapped loop above the pearl, trim the excess wire, and attach the drop to your ear wire. Repeat for the second earring, checking that both Hang evenly.
Design Tip: Add a small metal spacer or clear gemstone accent above the pearl for a small detail without complicating the design.
3. Pearl-and-Gemstone Stacked Drops
Difficulty: Easy Intermediate
For those who want a bit more visual interest, stacked drop earrings combine blue freshwater pearls with a complementary gemstone accent for added dimension and color contrast. This style works especially well with labradorite, moonstone, quartz, or aquamarine-toned stones. Additionally, the 6mm Labradorite Heishi Rosary Chain is worth looking at if you want a pre-wrapped chain option that incorporates stone accents.
Recommended Materials and Findings
Blue freshwater pearls, small gemstone beads, spacer beads, 22-gauge eye pins or wire, French hooks or leverbacks, and jump rings if needed.
Basic Steps
Make sure to plan your bead arrangement first, as this avoids any mistakes during the design process. After you're happy with your layout, create wrapped-loop bead links for each element, connect them vertically, and attach the top link to your earring finding. Then, lay both earrings side by side before finishing to ensure even length.
Design Tip: Stick to pale blues, grays, whites, or smokey neutrals so the pearls remain the focal point.
4. Blue Pearl Hoop Charms
Difficulty: Beginner to Easy Intermediate
Pearl charms on hoops offer strong visual impact with relatively simple construction. Depending on the hoop size and pearl scale, the finished look can feel anywhere from playful and modern to elevated and refined.
Recommended Materials and Findings
Small hoop findings, blue freshwater pearls, 22- or 24-gauge wire or head pins, tiny jump rings, and optional decorative charms.
Basic Steps
First, create small pearl drops using wrapped loops. Next, attach each charm to a jump ring, then slide the rings onto the hoop. Add additional charms if desired, making sure both earrings remain balanced.
Design Tip: Make the charms removable so the hoops can be worn in multiple ways.
5. Leverback Pearl Earrings for Everyday Wear
Difficulty: Beginner
Leverback earrings are practical, secure, and ideal for blue freshwater pearl designs you plan to wear regularly. The hinged closure offers more security than standard hooks while keeping the design both polished and wearable. If you're looking for inspiration, the 4–5mm Royal Blue Baroque Pearls work well here for a compact, polished result.
Recommended Materials and Findings
Two matched blue freshwater pearls, 22-gauge head pins, leverback earring findings, optional bead caps, and spacer beads.
Basic Steps
Add a bead or spacer if desired, then slide the pearl onto the head pin. Create a wrapped loop, open the leverback loop, attach the pearl drop, and close securely.
Design Tip: Bead caps create a more vintage-inspired look, while smooth spacers keep the design feeling cleaner and more modern.
6. Delicate Pearl Chain Threaders
Difficulty: Intermediate
Threader earrings create a lightweight, contemporary silhouette that works beautifully with smaller blue freshwater pearls. Additionally, this design relies on movement negative space rather than bulk, making them ideal for those who favor a delicate style. If you're looking for further inspiration, the Multi Gemstone Gold Hand-Wrapped Rosary Chain sold by the foot gives you a ready-made bead-and-chain option that works well in this format.
Recommended Materials and Findings
Fine chain, threader findings or thin chain with bar ends, small blue freshwater pearls, 24-gauge wire, tiny jump rings, and optional metal bead accents.
Basic Steps
To start, cut matching chain lengths. Next, create small wrapped pearl charms and attach them to the end or midpoint of the chain. Add a threader bar if needed, then test movement and overall balance before finishing.
Design Tip: Keep the pearls small, threaders look best when they remain light and fluid.
7. Cluster Pearl Dangle Earrings
Difficulty: Intermediate
Cluster earrings create fullness, texture, and movement by grouping several smaller pearls into a single design. This style works especially well with 4mm Blue Baroque Freshwater Pearl Beads, helping create a more organic, dimensional finish.
Recommended Materials and Findings
Several small blue freshwater pearls per earring, 24-gauge head pins, sturdy jump rings, short chain segments, French hooks or leverbacks, and optional gemstone accents.
Basic Steps
Begin by creating multiple pearl drops using wrapped loops. Attach them individually to a jump ring or chain section, varying lengths slightly for movement. Now, connect the finished cluster to your earring finding and mirror the design for the second earring.
Design Tip: Five to seven pearls per earring usually creates enough fullness without making the design feel overly heavy or busy.
8. Layered Pearl Chandelier Earrings
Difficulty: Intermediate to Advanced
For makers ready for a more advanced project, chandelier earrings create dramatic movement and statement-worthy visual impact. More specifically, multiple pearl drops suspended from a structured frame create depth, texture, and dimension. For design inspiration, The Blue Peacock Large-Hole Baroque pearls and the 9x8–10x8mm Peacock Large-Hole Baroque Strand are worth considering here for their scale and color depth.
Recommended Materials and Findings
Chandelier findings or 20-gauge wire for handmade frames, blue freshwater pearls in multiple sizes, 24-gauge head pins, jump rings, short chain segments, and ear wires or leverbacks.
Basic Steps
Start with your chandelier form. Create pearl drops in gradual lengths, attaching the center drop first before building outward symmetrically. Add chain sections for additional movement if desired, then attach the completed design to your ear wire.
Design Tip: Position the largest pearl in the center and work toward smaller pearls at the edges for a balanced, graceful silhouette. This keeps the earring from looking particularly top-heavy.
How to Choose the Right Design for Your Skill Level
If you're not sure where to start, use our difficulty levels as a helpful guide rather than a strict rule. Many blue freshwater pearl earrings are more approachable than they initially appear, especially once you understand the basic techniques.
Nonetheless, here's additional guidance on how to choose the proper design based on what you believe your skill level to be:
If You're New to Jewelry Making
Start with pearl studs or classic wire-wrapped pearl drops. Both projects are beginner-friendly, require minimal materials, and give you a polished, wearable result without a significant time investment. If you're new to wrapped loops, practice with inexpensive craft wire or copper wire before using your freshwater pearls. A little practice makes the process much more seamless.
You can also gain further information from reviewing our guide, "Beading 101: How to Get Started Making Jewelry."
If You Want a Giftable Pair
If you're making earrings as gifts, focus on designs with broad wearability. Pearl studs, leverback pearl drops, and pearl-and-gemstone stacked earrings tend to feel the most universally flattering and easy to style. Most importantly, these designs strike the balance between handmade charm and polished finish, making them ideal for birthdays, holidays, or thoughtful custom gifts.
You can also gain additional inspiration by browsing our post, "Birthstone Beads Guide: Month, Stone, and Gift Tips."
If You Want a Statement Style
For something bolder, cluster earrings and layered chandelier designs offer the most visual impact. Mixing pearl shapes, incorporating chain elements, and adding metal accents creates movement, texture, and a more dramatic silhouette. For general advice, blue baroque or ringed freshwater pearls work especially well here, as their natural texture catches the light and adds the perfect amount of dimension.
Finishing Tips for Professional-Looking Pearl Earrings
The difference between handmade pearl earrings that look polished versus unfinished often comes down to the small details. A few simple finishing techniques can make your blue freshwater pearl earrings look noticeably more professional.
Check Weight and Balance
Before deciding your earrings are entirely finished, hold each one up and check how it hangs. The design should feel balanced rather than pulling noticeably downward or sitting unevenly. For longer styles, lighter findings can improve comfort, while more minimal pearl placement often makes earrings easier to wear for extended periods.
Make Wrapped Loops Consistent
Clean wirework makes a major difference in the final result. Use the same section of your round-nose pliers for every loop to keep sizing consistent, and aim for the same number of wraps on both earrings for symmetry. Trim wire ends flush and gently tuck them in with chain-nose pliers so nothing catches on hair or fabric.
Protect the Pearls
Blue freshwater pearls are softer than most gemstones, which means proper care matters. After wearing, wipe them gently with a soft dry cloth to remove oils or residue. Also ensure you avoid direct contact with perfume, hairspray, lotions, and other beauty products that can affect the pearl surface over time. As a general rule, put pearl earrings on last when getting ready and store them separately from harder gemstones or metal components that could cause scratching.
Now that you have design ideas, create one of these blue freshwater pearl earrings!
Blue freshwater pearl earrings can be as simple or as layered as you want them to be. A pair of studs takes less than ten minutes. A chandelier design might take an afternoon. Either way, you end up with something you made yourself using real pearls.
Browse The Bead Traders' freshwater pearl collection for blue and aqua options across a range of sizes and shapes, and check the metal beads and findings and chain by the foot sections for everything else you need. U.S. orders over $100 ship free, and returns are straightforward if something doesn't work out. Pick a design, gather your materials, and start making.